Tuesday, November 6, 2012

A Short Hooded Cape

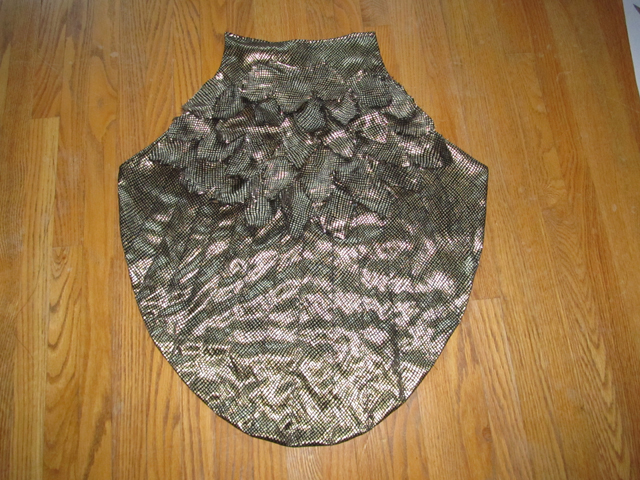
From a simple pattern, I made a hooded cape for a friend at work.  It was almost a full circle cape, which was too full for what he wanted, so I modified it to a 3/4 circle cape. I used McCall's M5957 Costume pattern. Get your hands on that pattern if you're interested in making capes.
I tried on the hood before attaching it to make sure it would be big enough.
I tried the whole thing on to make sure the length was correct.


I ended up lining it because the Jute fabric he had chosen was REALLY itchy!

Luckily, I had this extra clasp hanging around that I bought from a leather & sewing supply store 

And here's the cape on my friend at work, dressed as the long lost twin brother of Michonne from Walking Dead.


Thursday, November 1, 2012

Completed Costume


Here's a photo taken at work, where the costume contest took place. I won 2nd place!


Saturday, October 20, 2012

Cleopatra Elizabeth Taylor Style Headdress


Finally finished! It's not the sturdiest, but since the contest is indoors, it should be okay. A strong wind could break the Feather Sun Disc off its mount.

Tuesday, October 9, 2012

Cleopatra Headdress

Here is the nearly complete headdress. The crown is attached and so are all the hair twists and gold bullion fringe. It's not exactly like the Elizabeth Taylor one, but pretty close. Next, I will be attaching the gold feather Sun Disc part.


Sunday, October 7, 2012

Headdress With Gold Bullion Fringe

I was up until midnight attaching these gold bullion fringe "falls". Soon I'll be able to permanently attach the crown. I'm getting very worn out with this project.


Sunday, September 30, 2012

The Headdress Update

The feather-sun-disc piece isn't attached yet, but here's how it will look in place.

Wednesday, September 26, 2012

Egyptian Collar

 Here, by the way, is the finished Egyptian collar I was making. After Hallowe'en I might take it apart to make new necklaces out of since some of the beads are real Lapis Lazuli and coral.
I know the Liz Taylor costume didn't have this, but I'm taking some liberties with the design.

Here is where the crown will sit, although it isn't actually attached yet.

Sunday, September 9, 2012

Wing-Cape Completion


 Here are the last phases of my wing-cape completion. I had made the back panel too small, so I added to it and now it hangs much better. I drew guide lines on the wings and sewed over them as you would when quilting. So, after an entire day of sewing, I am pleased to say the cape is finished!
                                                         Next weekend....the dress!

Sunday, August 26, 2012

Cleopatra Costume Continued

 Now I have spray painted the Isis Sun Disc attachment gold, and it's awaiting my decision on how to attach it so it can be easily removed, but still be sturdy. I was thinking of using magnets. I'll also be cutting a bit more off the bottom.


I've decided to entirely abandon the crocheted cape idea. I haven't been able to get my hands on more of the required yarn and I'd still need a LOT to get the proper length in front. Instead, I'm sewing a cape using some wonderful fabric I bought a few months back as a precaution. I had a feeling the crocheted cape wasn't going to work out.

This is the completed back panel. I'm doing it in three pieces, like the actual one seen below. I have the two wings made but their embellishments aren't finished yet. At this point, I don't have anymore time to fool around with experimentation. It won't be as gorgeous as the real one, but I think that with the headdress, it will be a good representation.

Sunday, August 19, 2012

Isis Feather Sun Disc

 Here is my progress on the Isis-feater-sun-disc headpiece. I used balsa wood and carved both sides according to the template I drew, after referring to the images of Elizabeth Taylor. I'll be painting it with a couple thin coats of clear gloss then spray painting it with metallic gold. Whew....this costume is sure taking a lot of work!

Friday, August 17, 2012

This Years Costume (Cleopatra)

This iconic costume is what I have set my mind on...but lacking the time and money lavished on the original, I have to make due with simple materials and my limited skills.
Here was the beginning of my project...with a hoard of purchased materials and a rough idea of how I was going to assemble everything. At the very beginning, I customized a styrofoam head to have the same cranium size as myself. Then I crocheted a black cap and added things to it.

I had first intended to do goldwork with French Wire on the front, but after searching all over town for it, I found only one store that sells French Wire and it's damn expensive! So I crocheted little arcs out of gold metallic yarn and sewed them in place. I added some leaf shaped glass beads also.
I am lucky enough to know of a great leather supply place downtown where I purchased some gold leather. I made the three rows of "feathers" out of it. I also used real Lapis Lazuli beads with little rectangles of the gold leather to save time instead of beading with gold coloured bugle beads like it seems to have been done on the original.
After some miserable failures with papier maché, I decided the best way to make the cobras for the crown would be to make one, make a mould and cast the rest. I used two great products; JOVI air drying clay and Siligum Silicon moulding compound. Sorry I don't have photos of the progress, but above are the results.

I attached them to a ring of wire using a papier maché paste and allowed them to dry. By this time I had also begun the most time consuming task of making the gold bugle bead "feathers". They're driving me crazy! I haven't finished the second row yet, but I'm working on them.
You can't see them very well, but I had made my vulture head and cobra head out of papier maché then spray painted them gold. They will be attached to the front of the headdress.

Here is the finished cobra crown.....far from perfect, but with Hallowe'en fast approaching, I'm going to have to settle for less. I've just begun the process of carving the big "sun-disk-Isis-feather" out of balsa wood that will fit onto the top, but no photos yet.


As for the feather cape....this thing has driven me crazy right from the start. First of all, I looked at gorgeous fabrics that could have done the job, but they were selling from $98/yard and up. I figured with the right width of gold metallic yarn I could crochet one. I began this in December. At first I did a mesh stitch that just ended up looking like a sparkly fishing net, then I did a bit more research online and discovered the wonderful "Crocodile Stitch". I fell in love with it! I unravelled the entire thing I had already crocheted and began again....that's right. Began again. By this time it was around April or May. This is what I now have, but the bad news is the "wings" could be longer and the place where I've been buying this yarn has run out of this colour, so I'm embellishing the edges with fluffy gold yarn and hoping that will add the better length.
Here is a closer shot of the Crocodile Stitch. It uses quite a bit of yarn, but it looks really interesting. Not really like feathers, more like scales, but I like it. I also have a hoard of gorgeous gold sparkly fabric waiting to be sewn into the dress, but that should take the least amount of time.